


Description
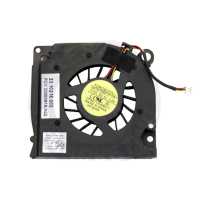
Dell Inspiron 1525 Fan Price Hyderabad
| Brand | Delll |
| Item Height | 30 Millimeters |
| Item Width | 9.4 Centimeters |
| Item Weight | 68 g |
| Product Dimensions | 9.9 x 9.4 x 3 cm |
| Item model number | KSB06205HA |
Introduction
Use this guide to help you replace the fan in a Dell Inspiron 1525.
Locate the battery release switch on the bottom of the laptop.
- Slide the battery release switch away from the lock symbol until you hear the battery click.
-
Slide the battery towards the back of the laptop until it comes free.
- Remove the two 4.00 mm Phillips #1 screws from the battery tray.
- Insert the flat end of a spudger into the slot on the right side of the central control cover and pry it up.
-
Carefully pull the central control cover up along its edges.
- Peel back the silver tape securing the ribbon cable to the cover.
-
Pull the small brown latch on the ribbon cable connector out.
-
Disconnect the ribbon cable to completely free the central control cover.
- Remove the two 5.75 mm Phillips #1 screws securing the keyboard to the laptop.
-
Gently slide the keyboard towards the display until the tabs on its front side are free.
- Use a spudger to gently lift the ribbon cable retaining flap.
-
Disconnect the ribbon cable.
-
Shift the keyboard sideways enough to free one side from it’s retaining tab. Then lift the keyboard away from the laptop.
- Remove the two 3.60 mm #1 Phillips screws securing the hard drive and hard drive tray.
-
Slide the hard drive and hard drive tray out of the laptop.
- Remove the 5.75 mm #1 Phillips screw securing the optical drive.
-
Pull the optical drive straight from the laptop
- Remove/loosen the eight 4.80 mm Phillips #1 screws securing the bottom panel.
-
The screws may only need to be loosened, as they are generally retained by plastic washers.
-
-
Remove the bottom panel
- Disconnect the five antennas from their respective cards.
-
De-route the antennas from their routing retainers.
- Remove the two 5.70 mm Phillips #1 screws securing the display assembly to the bottom case half.
- Use the flat end of a spudger to push the camera connector out of its socket. Alternate pushing on either side to evenly remove the connector.
-
Carefully release the connector from its retaining tabs.